Installation Guide senangPay Stripe for WooCommerce
1. Make sure that you already have WooCommerce plugin installed and activated. Also make sure you have senangPay Stripe zip file ‘senangpay-payment-gateway-stripe-for-woocommerce.zip’.
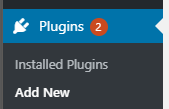
2. From your WordPress admin dashboard, go to menu ‘Plugins’ and ‘Add New’.
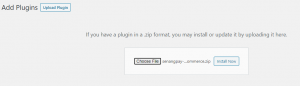
3. Click ‘Upload Plugin’ > ‘Choose File’, choose ‘senangpay-payment-gateway-stripe-for-woocommerce.zip’ and click ‘Install Now’.
4. Once installation successful, activate the plugin through the ‘Plugins’ screen in WordPress admin dashboard and click ‘Active’.

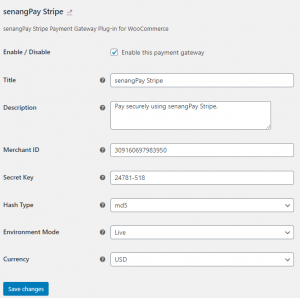
5. Go to menu WooCommerce, Settings, Payments, senangPay Stripe and click ‘Manage’. Fill in your merchant id and secret key. You can retrieve the merchant id and secret key from senangPay Dashboard at https://app.senangpay.myfor live account and https://sandbox.senangpay.my for sandbox account.
6. By default the hash type will be md5, but you may change it later to sha256 which is strongly recommended by senangPay. You may refer to the hash type defined in senangPay dashboard.
7. The environment mode by default is live. However if your website is not ready for production but for testing, you may choose sandbox (This required you to have sandbox account).
8. Currency by default is MYR. If you are multicurrency, you can change currency to any payment that you prefer. If you just subscript to Stripe without multicurrency, make sure it currency selected is MYR only. Currency that available is ‘MYR’, ‘USD’, ‘EUR’, ‘IDR’ ‘THB’, ‘JPY’, ‘AUD’ and ‘GBP’.
9. Make sure the ‘Enable this payment gateway’ is ticked. Click on ‘Save changes’ button.
10. In senangPay Dashboard make sure you key in your return URL and callback URL as http://your_domain/checkout/ and choose ‘Read response and send email if error’ for callback response, finally press Save. Please leave the ‘Return URL Parameters’ field empty.
11. Please download the plugin file below :